keywords: Go, cloud infrastructure, software
The What and Why of Jaypeg (and this post)
I thought building an image host would be fun, so I started making my own. This blog series is intended to be a refined journal of my experience building that image host, along with some code and thoughts that will hopefully help you on your own software creation adventures. If you’re a “just show me the code” person, you check out my code here. The rest of this post shows a bare minimal implementation which we’ll improve and iterate on over the course of the blog series.
If you’re a programmer who is curious to making something like Imgur, ImageBB, ImgPile, or any other image host, this blog post is for you. If you’ve never read Go before, you should be able to read the code snippets just fine if you’re familiar with C, or any language inspired by C. It would also help if you know a little about HTTP, but I cover enough of it in the post that you should be able to get by. Now, onto image hosts.
There are a lot of image hosts out there on the Internet. The core functionality can be reduced down to two key features:
- Uploading an image to the host over the Internet.
- Retrieving a previously uploaded image over the Internet.
Since the core functionality is so minimal, it’s very approachable for someone like myself who has limited experience building web services. However, there aren’t a lot of ways you can monetize image hosting without making a user’s experience worse (Source). What if we took the concept of an image hosting service, and played with a giant bag of cost-saving tricks until it could be sustainably run as a hobby project?
Generally, the goals of this project are (in order):
- Have fun learning the ins and outs of building a web service in 2021.
- Keep OpEx dirt cheap. Under 100 USD a month while serving 1TiB a month in image traffic.
- Make something worth blogging/chatting about.
Note that making money isn’t a goal. Once the image host goes live, I’ll fund it myself for a few months, and there will be a donation link at the bottom of the landing page. If it turns a profit from donations alone, I’d celebrate for sure. But I care a lot more about having fun and honing skills I can use to make cool stuff.
Alright, enough of the mission statement hooplah, let’s get to building.
System Overview
I’ve already outlined the two main use cases, so let’s get a system diagram that outlines what we’ll need to make it happen.
(image with user, app, and storage hierarchy)
We’re keeping it simple for now and we’ll make it more complicated as we go.
For the actual web backend, I’ve chosen to write it in Go, because it what I use while I’m working on research. It also doesn’t hurt that Go was heavily designed with web services in mind.
Deploying this code will get covered in a later entry in this series, as cloud infrastructure is a whole ordeal in itself, and the code we’ll be writing in this post is not ready to be connected to the open Internet.
Use case 1: Uploading an Image to the Internet
We need to set up that computer to accept images which are sent from our potential future users. For the sake of simplicity, let’s spin up the HTTP server that comes in Go’s standard library. Here’s the starting point for our code:
func main() {
	err := http.ListenAndServe(":8080", nil)
	if err != nil {
		panic(err)
	}
}
I’m sure there are lots of great web frameworks for Go, but why bother? Let’s let the problems come to us instead of solving problems we don’t have with fancy dependencies and new features. Decades of work has gone into building and designing everything that powers the Internet, from protocols like HTTP to the tech powering our virtual computer hosted *in announcer voice* on the cloud.
I want to keep it simple, but still easily useable, so let’s make a simple landing page that doubles as an HTML form for uploading files. It’s so simple, that it’s only 26 lines of HTML when prettified. The source is here
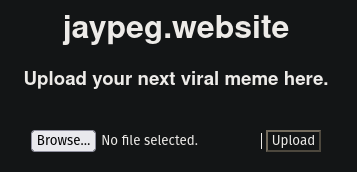
Jaypeg's Landing Page
When anyone visits http://jaypeg.website, they’ll see this web form. “Browse” lets the user pick an image on their computer and “Upload” sends the image back to the computer hosted by Digital Ocean. So simple I could probably teach my grandmother to use it! If you’re more technically inclined, you could also use curl to send images as well.
The code for showing the landing page breaks down into three parts. First, we load the landing page into memory, so let’s write that real quick:
//loadFileAsString fetches a file and loads the whole thing as a string
//
// Don't use this on large files!
func loadFileAsString(filename string) (string, error) {
	fp, err := os.OpenFile(filename, os.O_RDONLY, 0755)
	if err != nil {
		return "", err
	}
	defer fp.Close()
	var buf strings.Builder
	_, err = io.Copy(&buf, fp)
	return buf.String(), err
}
Then we write a function which will return that landing page to users:
//serveLandingPage sends the first page users will see
func serveLandingPage(w http.ResponseWriter, r *http.Request) {
	w.Header().Set("Content-Type", "text/html; charset=utf-8")
	landingPage, err := loadFileAsString("landing_page.html")
	if err != nil {
		log.Fatal(err)
	}
	_, err = io.WriteString(w, landingPage)
	if err != nil {
		log.Fatal(err)
	}
}
And then we edit our main() entry point so that the HTTP server calls
our serveLandingPage function when they first arrive at our website:
func main() {
	// This is the new line
	http.HandleFunc("/", serveLandingPage)
	err := http.ListenAndServe(":8080", nil)
	if err != nil {
		panic(err)
	}
}
We’ve made it this far and we already have something that we can see with my eyes. It’s not much, but it’s mine. If you’re following along with this code snippets, its yours as well. Ours, if I could be so bold.
Now that the first dopamine rush is over, you’ll quickly notice that the buttons on our landing page don’t do anything quite yet. That’s because we have write the handler which accepts the POST request sent from the user containing the image. Let’s handle those images in three steps:
- Parse the request
- Get the image from the request, and create a
structwrapping that images as it travels around our code. - Save the image to a file.
This isn’t a production-ready approach, but it is simple to implement while still providing some functionality we’d expect to occur when someone uploads an image. Instead of showing this piecemeal, I’ll provide the heavily commented code here and break it down after:
const (
	LocalImageDirectory string = "img/"
)

//collectUploadedImages is the main ingress point for all new images.
//
// First, use ContentLength for sizing the fileparsing buffer, otherwise
// default to 128MiB buffer.
func collectUploadedImage(w http.ResponseWriter, r *http.Request) {
	// Step 1: Parse the POST request
	if r.ContentLength > 0 && r.ContentLength < 1<<29 {
		r.ParseMultipartForm(r.ContentLength)
	} else {
		r.ParseMultipartForm(1 << 28)
	}
	imgHandle, err := r.MultipartForm.File["filename"][0].Open()
	if err != nil {
		log.Fatal(err)
	}
	defer imgHandle.Close()
	// Step 2:Extract the decoded image, and wrap it in a struct
	imgData, err := io.ReadAll(imgHandle)
	if len(imgData) == 0 {
		log.Default().Println("INFO: Upload request sent without image attached")
		return
	}
	// SHA256 Checksum serves as unique identifier for that file
	sha256Sum := sha256.Sum256(imgData)
	if err != nil {
		log.Fatal(err)
	}
	conf, format, err := image.DecodeConfig(bytes.NewReader(imgData))
	img := UserImageRecord{
		ID:              base64.URLEncoding.EncodeToString(sha256Sum[:]),
		ArrivalDateUnix: time.Now(),
		Name:            r.MultipartForm.File["filename"][0].Filename,
		Format:          format,
		Config:          conf,
		Contents:        imgData,
	}
	// Step 3: Log and save to disk
	logImage(img)
	err = saveImageToDisk(img, LocalImageDirectory+img.ID+"."+img.Format)
	if err != nil {
		log.Fatal(err)
	}
}
For step 1, we again lean on on the wonders of tech provided to us: the Go
standard library provides us with form parsing
code, so let’s not
reinvent the wheel here. Once the form is parsed, we get something that
implements io.Reader to slurp out the data out of the POST request and into
my code.
NOTE: I’m not really doing a lot of edge case handling (read: idiot-proofing) here, but it really should be there before the service goes live!
Step 2 is object creation time. We start by creating a digital fingerprint of
the image contents. That way we don’t have to worry about dealing with two
different images which were both uploaded with the same file name, and we can
check for duplicates. Nice. The rest of the struct gets filled with
information accordingly. Here’s the actual definition:
//UserImageRecord wraps image data + metadata across Jaypeg's codebase
type UserImageRecord struct {
	ID              string       //Base64-encoded SHA256 checksum, unique to that image
	ArrivalDateUnix time.Time    //Time when image was recieved by backend
	Name            string       //The given name of the file when it was uploaded
	Format          string       //Image format of the file (JPEG/PNG/GIF)
	Config          image.Config //Image metadata lifted upon ingress
	Contents        []byte       //The actual image contents
}
I’m intentionally omitting explanations for a lot of function calls here because the documentation for Go’s standard library is quite good, and when the documentation fails, the Go tag on StackOverflow is quite active.
For Step 3, we log our relevant info, and then call this function to write to disk:
//saveImageToDisk writes the image file associated with the record to disk
func saveImageToDisk(imgData UserImageRecord, destFilename string) error {
	fp, err := os.Create(destFilename)
	if err != nil {
		return err
	}
	defer fp.Close()
	bytesWritten, err := fp.Write(imgData.Contents)
	log.Default().Printf("Wrote %d bytes to disk as %s", bytesWritten, destFilename)
	if err != nil {
		return err
	}
	err = fp.Sync()
	if err != nil {
		return err
	}
	return nil
}
NOTE: We really shouldn’t rely on mere disk storage for anything beyond basic testing. We need a much more complex storage solution for a production setting. We’re prioritizing goal #1 over goal #2 to keep us moving!
Lastly, don’t forget to add collectUploadedImage() to our
server. It’s important to note the endpoint in http.HandleFunc() and the
endpoint in the HTML form on our landing page have to match. Now, our main()
looks like this:
func main() {
	// Two HandleFunc calls instead of just one from before
	http.HandleFunc("/upload", collectUploadedImage)
	http.HandleFunc("/", serveLandingPage)
	err := http.ListenAndServe(":8080", nil)
	if err != nil {
		panic(err)
	}
}
If you’ve made it this far, you should be able to run your program like so:
$ go run main.go # main.go is the file with the code
And then upload an image through your browser and see a log that looks like this:
2021/07/28 04:09:05 Got img name: best_meme.png at 2021-07-28 04:09:05.213180025 -0400 EDT m=+2.571278274
2021/07/28 04:09:05 Image is 642 x 1239 png
2021/07/28 04:09:05 Wrote 1365092 bytes to disk as img/jyJgtn8DOKUDTQOTAtl29xMBR1MJ3bMeVDwOjY-uvV0=.png
In case you missed it, img/ is added to the destination filename when I call saveImageToDisk(), this comes in handy for the next part.
Use case 2: Retrieving a previously uploaded image
So believe it or not, thanks to the simplicity of our solution for our first
use case, we can actually get away with the second one with literally one more
line of code in our main():
func main() {
	http.Handle("/img/", http.FileServer(http.Dir("")))
	http.HandleFunc("/upload", collectUploadedImage)
	http.HandleFunc("/", serveLandingPage)
	err := http.ListenAndServe(":8080", nil)
	if err != nil {
		panic(err)
	}
}
I’m dead serious. That’s it. Seriously? Seriously. If you’ve made it this far,
try it. This new line of code in our main() attaches to an endpoint which has
the same name as our image folder, so it just retrieves the image files from
that folder. The whole use case is just one call to the standard library. Isn’t
technology amazing? The full code is available at this GitLab
repo, and an early build of
Jaypeg will be publicly available shortly.
Now, I hope it’s clear that the sky is the limit of what we can do. We haven’t
even started thinking about cost. Hell, we aren’t even doing anything
with the UserImageRecord besides logging. In the next part in this series,
I’m going to look at improving our approach to security and storage so that we can
get our code connected to the Internet.
Until next time.